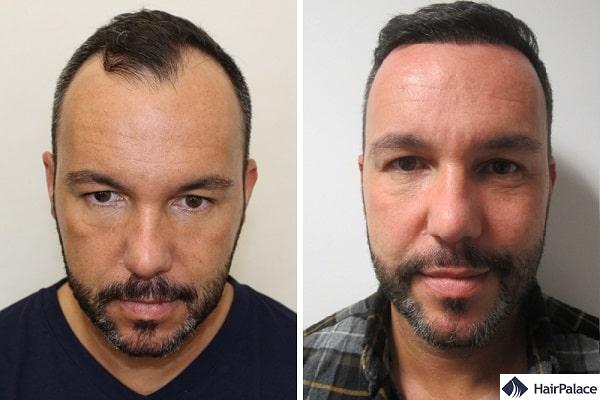
From the Consultation to a Dense Hairline – Jerome’s Hair Transplant
Taking the first step is often the most important. How is it best to start planning for the hair transplant then?
Well, we would recommend having an assessment first. This way you can find out the precise details, and get an offer to consider.
Jerome contacted us during his thorough research for a hair transplant clinic and a suitable hair transplant method.
In this case study, we will take a look at Jerome’s FUE2 hair transplant from the examination to the result!
The personal examination
Jerome met us on the 22nd of August 2018.
We always start the hair transplant consultation with a discussion about the patient’s hair loss and their general medical history.
Every health issue and any ongoing medication must be considered to make sure we can carry out the hair transplant safely.
Then, we can move on to examining the hair and the scalp, and discussing the result the patient would expect.
Jerome’s goal was to fill up the triangles at the front and restore his hairline that crawled back over the years.
We have roughly sketched the shape and position of the hairline he had in mind:
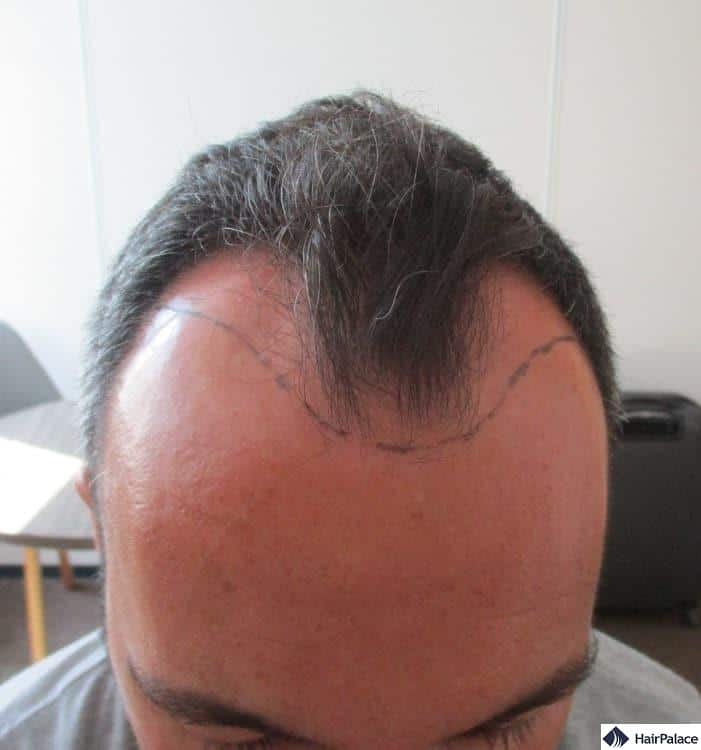
At this point in the process, an approximate hairline is enough to determine the number of hairs and create a treatment plan.
On the day of the surgery, however, we spend as much time on shaping the hairline as necessary.
We don’t start the implantation until the patient is completely happy with the line.
We have also examined the back and the sides of the head and found that Jerome is a great candidate for the hair transplant.
His donor area was of sufficient size and density allowing us to extract the hairs needed to achieve a good result at the front.
Surgery day
We have carried out Jerome’s hairs transplant on the 23-24th of October 2018.
Over the 2-day procedure, we transplanted 6342 hairs in total.
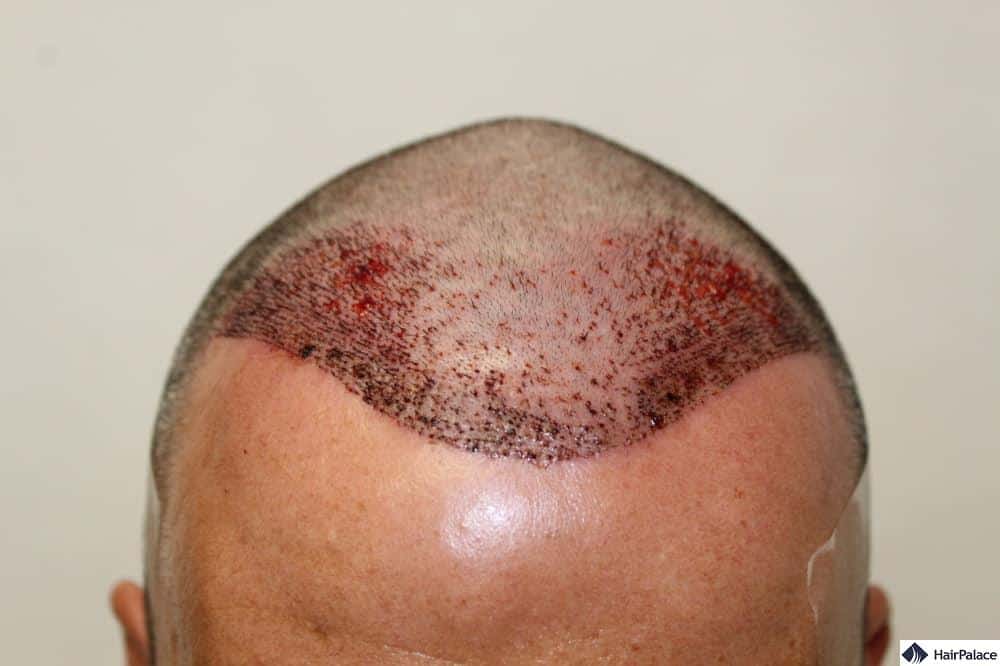
The previously empty triangles at the temple areas required the majority of the hairs to build up the density. A smaller number of hairs were used to strengthen the hairline at the middle of the forehead and to even out the density at the frontal area.
Under the magnifying glass we see the density very precisely so if needed, we can strengthen other areas too.
On the photo below, you can see how Jerome’s doctor placed a few hairs into the mid-front too. This helps us to achieve an even density and a natural look:
The pain poses the biggest worry for the patients before the hair transplant.
Be it the extraction or the implantation phase, before we start working, we administer local anaesthesia.
The first injections might be unpleasant, but the lidocaine swiftly numbs the area to ensure a pain-free procedure.
After his surgery, Jerome detailed his experience about the pain levels too:
No pain during the intervention.
I felt only a manageable pain when the anaesthesia wore off, but I was given painkillers.
I was tired, but again, it is normal after the surgery.
Just as Jerome noted, it is only natural to feel tired by the end of the surgery. With 6000 hairs, the procedure takes around 6-8 hours on both days.
How does it feel after the surgery?
After the effects of the lidocaine wear off, in the first day or two, the scalp might be a bit tender.
For these instances, we always provide patients with a couple of painkillers so they can manage the discomfort if needed.
More often, patients report that the surgery sites are not sore, but compare the feeling to wearing a helmet.
Aftercare and the post-op period
A day after the surgery, patients can return home armoured with detailed instructions and medication necessary for the aftercare period.
For a week after the transplant, it is not allowed to touch the implanted area.
The hairs need some time to anchor, so it is best not to move them.
Plus, this also makes it easier to prevent any dirt getting into the tiny wounds.
The scabs are removed during the 2nd and 3rd post-op week. Patients have to soak and massage the scalp daily, ever so gently, so the hairs stay in place.
Let’s take a look at how much the recipient area changed between the 1st and 3rd-week check-ups in Jerome’s case:
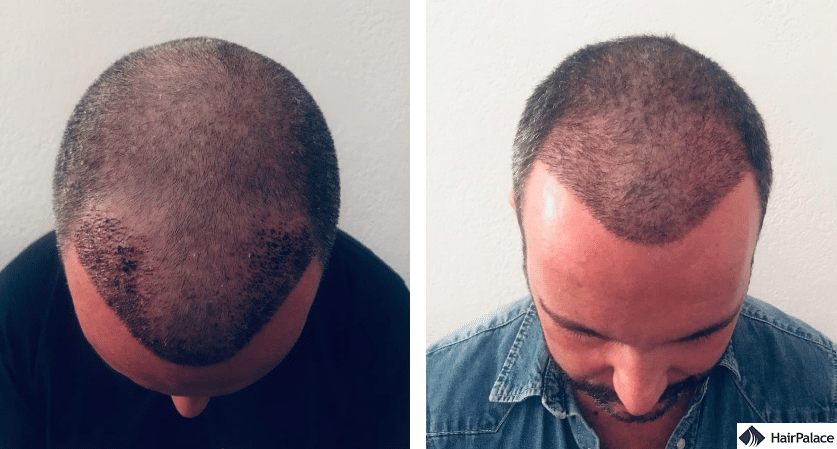
It is well visible that Jerome followed the instructions carefully.
The scalp healed well, there was no sign of irritation, and the hairs were in place on his three weeks’ photos.
The next period is probably the scariest – the transplanted hairs fall out.
Consequently, at the three months’ check-up, there is not much to see, except for a couple of hairs peeking through here and there.
In Jerome’s case, some redness was visible too.
It is still normal for sensitive skin and did not indicate a disorder or inflammation. In case of more sensitive, light skin, it might take weeks for the redness to fade away completely.
From around the 4th post-op month, the new hairs start to grow out, increasing the density gradually. For Jerome, the change was remarkable by his 6th months’ check-up.
You may take a look at the difference the 3 months made between his 3 and 6 months’ check-ups:
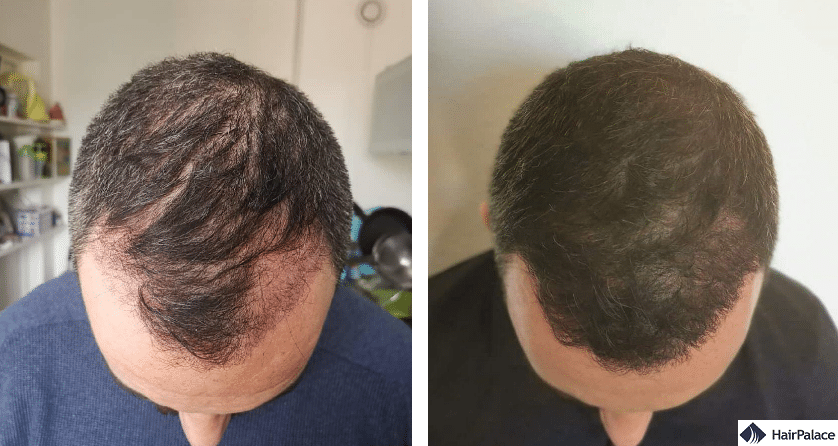
Jerome’s final result
After the 6 months’ check-up, the density continues to fill up.
In this period the implanted area does not need special care or attention.
Everyone has their own pace; typically, the final result is visible 12-15 months after the surgery.
A year after the surgery Jerome’s result was complete.
The density achieved is almost identical to the rest of the hair, providing a natural look:
